CI/CD Pipeline Design: The Stages
The objectives and design of the test stages in a regular, distributed team environment.

Building CI/CD pipelines seems to be one of those topics that every team seems to struggle with. There are many effects that contribute to this:
- CI pipelines are almost always legacy infrastructure, built at a time when both the software and the team were fundamentally smaller and simpler.
- Being tooling infrastructure, they are never a priority. As a result they are never maintained or adjusted to new needs.
- For the same reason (not a priority), people almost never invest any significant amount of design in them. As a result they are almost always stitched together in a “quick-and-dirty” fashion.
- Often they are handed down from team to team, with the result that the end users almost never know how they really work and are afraid to modify them.
- It is generally easy to work around issues with the pipelines instead of fixing them, so people generally do. Unfortunately, it is also very wasteful.
A while back, some of my teams run into major problems working with the existing pipelines as they were, so we decided to take our fate into our own hands and re-design them to serve our needs. In this 3-part series, I will explain the design, and why it is the way it is. Note that the message is not that other teams should use this design - we designed our pipelines our way, to solve specific problems that we had. The more useful idea would be to explicitly design your pipelines to solve specific problems you have. That being said, some of the problems we were trying to solve are fairly common, and you may find that our solutions work for you as well.
In this first part, I will focus on defining the objectives of the pipelines, and on defining the stages we decided to go with. In the second part, I will focus on the main Build-Deploy-Test loop, and the design decisions we made in each part of the loop. In the third part, I will show how we put everything together, and additional optimizations one could implement.
Let's begin by providing a simple definition of what the objective is:
The objective of a CI pipeline is to automatically ensure that quality and other health targets are maintained as the code is modified on a daily basis, in order to guarantee that the software is kept in a releasable, as well as maintainable state. The objective of the CD part, is to automate the release process if the software is in a releasable state.
There are a few things worth noting. First and foremost, CI/CD is not just about quality; it's about software health. The value is not just in fewer bugs in production; it is also about faster and more reliable development and release processes. Correspondingly, the focus is not simply on functional testing; other types of tests, including non-functional requirements (performance and security in particular), as well as code health checks (style checks, complexity, test coverage, static code analysis, etc.) need to be included. Second, and equally important, is the fact that CI/CD is not about running through a particular process, but about ensuring that the software is in a particular state. This means that the automation is not just a labor saving measure, but a guardian of the health of the software. It is important that developers are not working around the pipelines.
It is probably also important to make the distinction between tests and checks. For the purposes of this discussion, we will define them as follows:
- A test is a way of exercising a piece of functionality, and verifying that the behavior of the software is as desired. The best examples are unit tests, and UI tests (e.g., Selenium tests).
- A check is a way of inspecting the software (usually in source form), and verifying that the structure of the code meets certain criteria. The classic examples are style checkers, and static code analyzers.
With those definitions in place, the basic idea is simple: As each developer makes changes to the software, the software is built, and a certain set of checks and tests are run to assess the health of the code. The outcomes are communicated to the team, and may trigger additional actions (such as further checks). For the CD part, if the software is given a clean bill of health, it is deployed to production. Fundamentally, everything in a CI/CD pipeline could be described in those simple terms above. To make the process practical, however, the idea needs to be refined a bit further. In particular, not every test and check imaginable will run every time a modification is made. In reality this means that there are multiple pipelines, run at different times, each performing a different set of tests and checks. Commonly these are referred to as Stages, probably stemming from a design pattern where they are arranged as a series of sequential steps, and successfully meeting the criteria (in terms of checks and tests) of the previous step (stage) automatically triggers the next stage. While I am not a fan of the design pattern, I will also use the term “stage” as I have no better alternative. (My teams used to call these “environments”, but this was due to an even less appealing design pattern, where there was an environment dedicated to each set of tests).
The easiest place to start is with the most obvious stage: the one for release candidates. We call this the RC stage. The idea is that, once a Product Owner has decided to push an increment to production, (s)he would trigger this stage, with the purpose of ensuring that the software meets all the quality criteria (except performance and security) to go to production. As a result, this stage will usually run all unit tests, API tests, and regression tests, as well as all code health checks. Note that in the strict interpretation of “Continuous Deployment”, every commit is a release candidate, so this stage would run on every commit. We, however, were not ready for fully automated deployment yet, so our RC stage only ran once the Product Owner had defined what he wanted to put in the next release (usually at the end of each sprint).
Next to the RC stage, we put two other, closely related stages: PLS (Performance, Load, and Stress test), and SEC (security testing). Once again, these are the types of tests that are required to ensure that the software is ready to go to production. We chose not to run them as part of the RC stage, however, since each of these tests has the potential to render the system under test unusable, and would interfere with the smooth execution of the other tests and checks running under RC.
The next easiest stage to describe is Commit. This runs every time a developer commits a modification to the code repository. The purpose is to run sufficient tests and checks to ensure that the commit is unlikely to break the software in such a way that it interferes with other developers (e.g., committing a change that breaks the build, or prevents the application from initializing properly). Note that the focus of Commit is not preventing bugs in production, but allowing efficient development (i.e., enabling developers to work on the same application without interfering with each other's work). Since it runs on every commit, the Commit stage cannot run a lot of heavyweight tests and checks. From the functionality perspective, it only runs smoke tests, to ensure that the application can still initialize properly, and that in broad strokes, one can still exercise most functional areas of the application. This is sufficient to make it unlikely that the changes submitted have broken functionality that some other developer will need in order to test his/her changes (e.g., login functionality). Additionally, all code health checks and unit tests will need to be run on the specific code that has changed. In the minimal scenario, this will include style checks, static code analyzers, and unit tests for the units that have changed. Checks that are global in nature and take a long time to run (in our case, Fortify was the most important one) will not be run in the Commit stage (but will be run in RC).
With only the stages described above, we were left with a small challenge. The Commit stage would run on each commit but would not run all the tests and checks. As a result, the probability that there was a change that undetectably degraded the health of the code went up with each commit, up until the next release candidate was tested on RC. Then the probability dropped back to 0 (since all tests were run on RC), and slowly started inching up again until the next RC run.
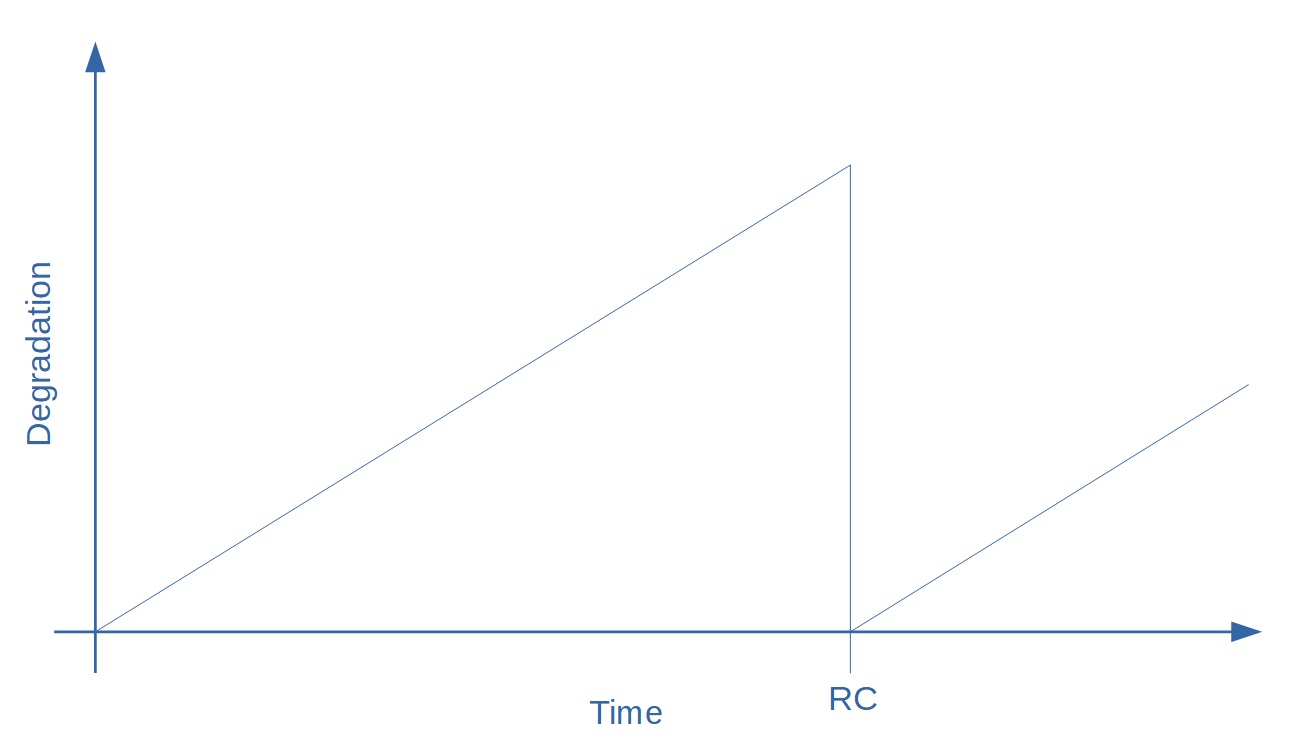
Health Degradation between RC runs
While that can be an acceptable amount of health degradation for some teams, we decided to reduce it even further by the addition of another stage: Nightly. As implied by the name, the Nightly stage runs every night, and runs full regression testing, all unit tests, and all static code scans on a snapshot of the code that is in the code repository at the time. This includes the Fortify scan which takes too long to run during the Commit stage. The Nightly stage has the effect of correcting the degradation back to 0 every night, preventing it from climbing too high.
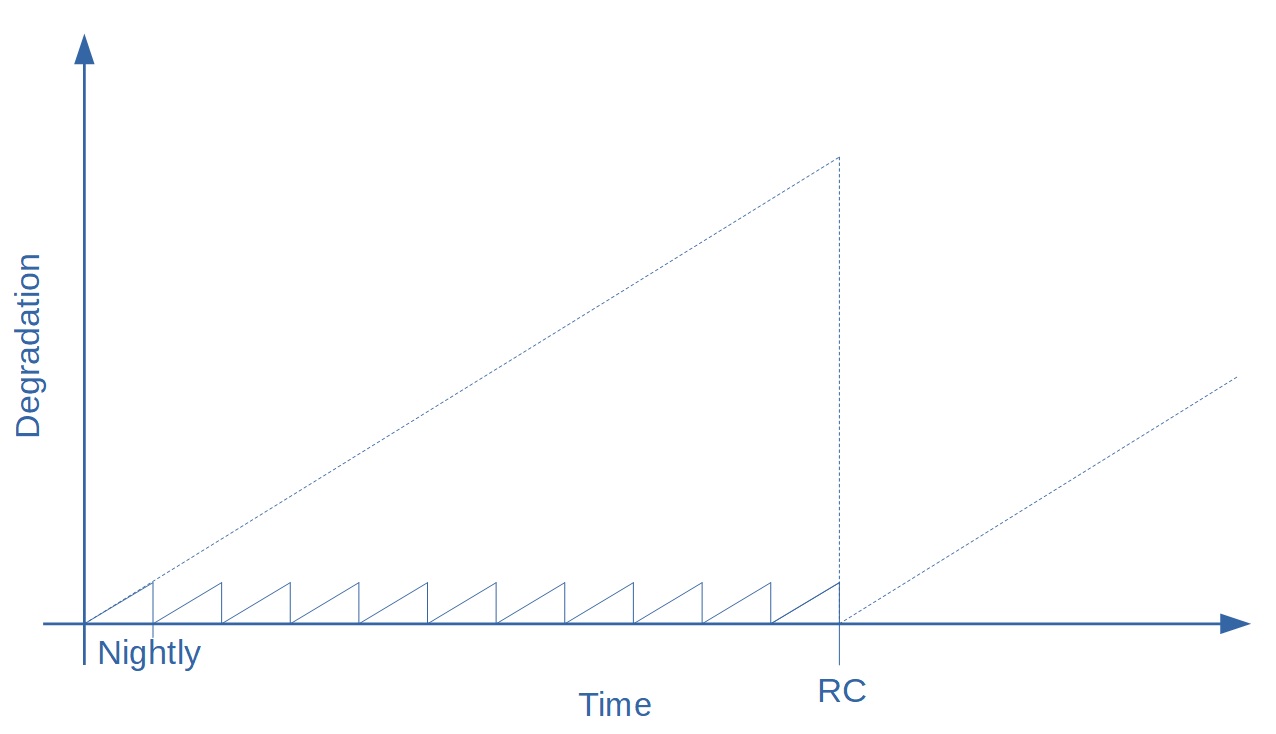
Effect of Nightly on health
Finally, there is one last stage that is easily forgotten: Local. This represents the checks and tests performed on the development machine itself. The main reason for declaring the developer machine a stage was our belief that the best place to catch all those little errors that degrade code health was before the code was committed to the repository in the first place. This means that the corresponding checks have to be done before commit, on the local machine of the developer. Our expectation is that developers clean their own code on their own machines, and only expose other developers to clean code. We embodied this expectation in the principle that it was not OK for anything to fail in Commit, Nightly, or RC. As a result, developers were expected to not only test that their modifications worked, but also run all the tests that would run on Commit, and make sure that Commit would not fail. Note that it did not mean that this set of tests runs within a Jenkins pipeline - it did not make sense to us to add the burden of a CI/CD infrastructure on developer laptops. However the tests had to be run with a process that was guaranteed to be equivalent to what the Commit stage would use (I will explain the solution in Part 2 of the series).
Stepping back to see the big picture, it is worth pointing out the following: as designed, the various stages are very similar to each other, and, with minor exceptions, only differ in three specific attributes:
- How/when they are triggered
- Which version of the software they build and test
- Which tests and checks they run
This proved very important when it came to designing the Build-Deploy-Test loop (which will be described in Part 2 of the series). The table below shows a summary of the environments and the three attributes.
| Stage | Version | Trigger | Tests / Checks |
|---|---|---|---|
| Local | Local changes | Manual | style checks, static code analysis, unit tests, smoke tests, specific tests by developer |
| Commit | Version in Commit | Commit | style checks, static code analysis, unit tests, smoke tests |
| Nightly | Snapshot at trigger time | External timer | style checks, static code analysis, unit tests, expensive code analysis, full regression |
| RC | Release candidate | Manual by the PO | style checks, static code analysis, unit tests, expensive code analysis, full regression |
| PLS | Release candidate | Manual by the PO | Performance, Load, and Stress tests |
| SEC | Release candidate | Manual by the PO | Security tests |